
ELITE RGB & MasterPlus+
Easy Setup
Activating your monitor’s RGB
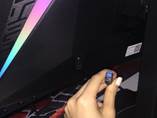
1.) Plug in the USB 3.0 chord into the monitor and PC.
Type-A (rectangle) plugs into the PC.
Type-B (square) plugs into the monitor.') !!}

2.) Using the OSD control button on the monitor, navigate to the Setup Menu and turn “ELITE RGB” on. If you haven’t already downloaded the software, click here.
Basic lighting Mode Setup
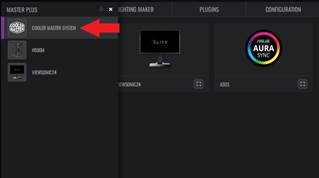
1.) Click the Cooler MasterLogo in top left-hand corner of the program and click
COOLER MASTER SYSTEM to view all synced hardware.

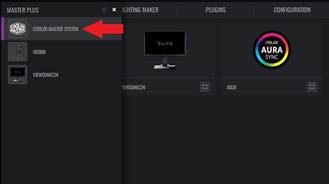
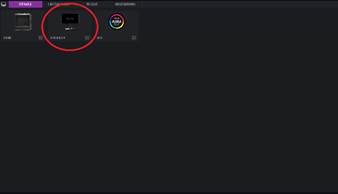
2.) Click on the image of your ViewSonic Elite gaming monitor.
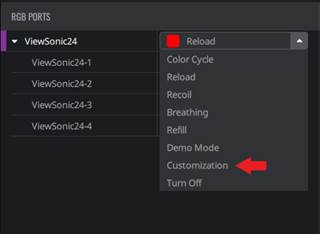
3.) On the left side of the program under RGB PORTS, toggle through the RGB effects list to choose your preferred lighting mode.
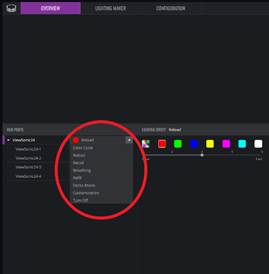
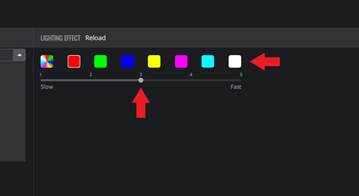
4.) To the right of RGB PORTS in LIGHTING EFFECT
pick the color of the effect by clicking the color square and adjust the speed of the effect by clicking a number 1-5. (1 = slowest, 5 = fastest)
Individual LED Color Customization (Basic Lighting Mode cont.)
1.) Under RGB PORTS, drop the RGB effects list. At the bottom of the RGB effects list, click Customization
to choose colors for LED units from a larger color palette.
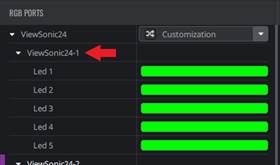
2.) Under RGB PORTS
you will see the name of your monitor. Underneath the monitor name, click the ViewSonic LED port to add one color to every LED unit in the designated port. (ex.  )
)
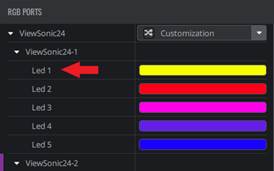
3.) To change the color of an individual LED unit in the LED port, click the LED #.
(ex.
 )
)
Lighting Maker Mode
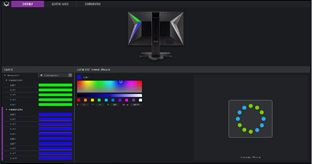
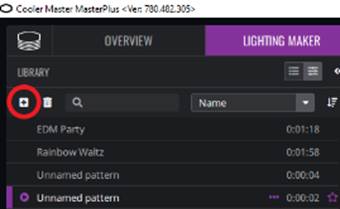
1.) Click LIGHTING MAKER at the top of the program.

2.) On the top left, under LIBRARY, click the plus sign to create a new pattern.
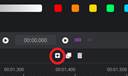
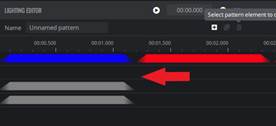
3.) Under LIGHTING EDITOR in the middle of the program, click the plus sign to add a new pattern element in your lighting sequence.
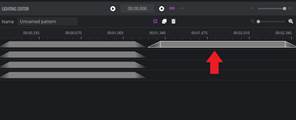
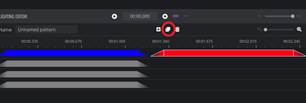
4.) Next to the plus sign, click the overlapping boxes to duplicate the selected element in the same channel.
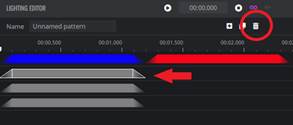
5.) Next to the overlapping boxes, click the garbage bin to delete the selected element.
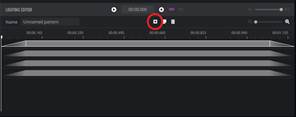
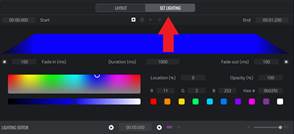
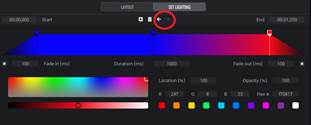
6.) At the top middle of the program, click the SET LIGHTING buttonto display editing features for colors, duration, and the element’s fade in/out.
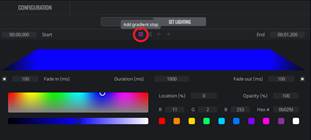
7.) To add gradient stops to your pattern element, click the plus button under SET LIGHTING.
Gradient stops will allow you to add multiple colors in one element. Click the gradient stop and add a new color to the designated area by clicking the desired color in the color palette. The more stops you add, the more colors you can add, but the shorter the colors will become.
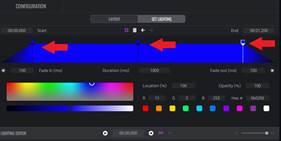
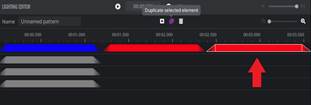
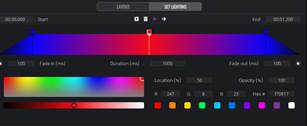
8.) Swap the position of a gradient stop in your pattern element by clicking the stop and then clicking the arrow in the direction you want the gradient to move.
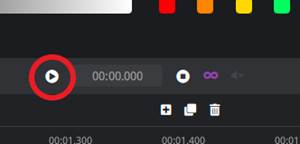
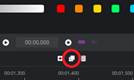
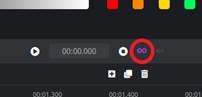
9.) Once you have created a sequence, press the triangle PLAY button in the middle of the program to preview your creation. View the length of your creation in the playback timer next to the PLAY button.

10.) Next to the playback timer, click the infinity sign to loop on/off the playback of your created lighting sequence.
1.) Under LIBRARY in the LIGHTING MAKER section, click the Lighting Application button.
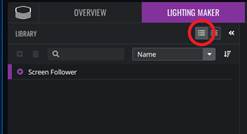
2.) Click the triangle PLAY button next to Screen Follower to activate the Screen Follower mode.
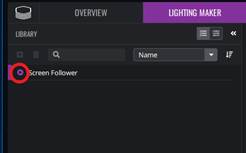
3.) Once you hit the PLAY button, the RGB will react to the dominant colors displayed on the screen. For the best results, put your game or entertainment in Full Screen.
Syncing your monitor to your RGB setup
1.) Click the Cooler Master logo in the top-left corner, then click COOLER MASTER SYSTEM at the top of the list.
2.) Click LIGHTING MAKER at the top of the program.

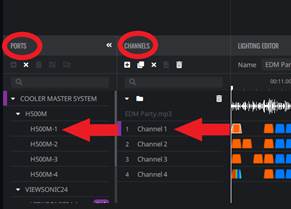
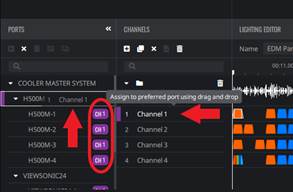
3.) In the middle-left side of the program under PORTS,
you will see the devices synced in the COOLER MASTER SYSTEM. Next to PORTS you will see CHANNELS. Click and drag a channel to the preferred port to activate the RGB in that single port. Assign a lighting channel to each port under your devices you want the RGB sequence to be activated.
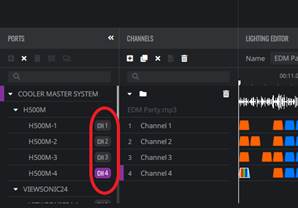
4.) To assign all ports in one device a single channel,
click and drag the channel over-top of the device name. E.g. If you drag channel 1 into device H500M then all ports under H500M will activate the Channel 1 RGB sequence.
5.) Click the triangle PLAY button to activate the RGB assigned to your devices.