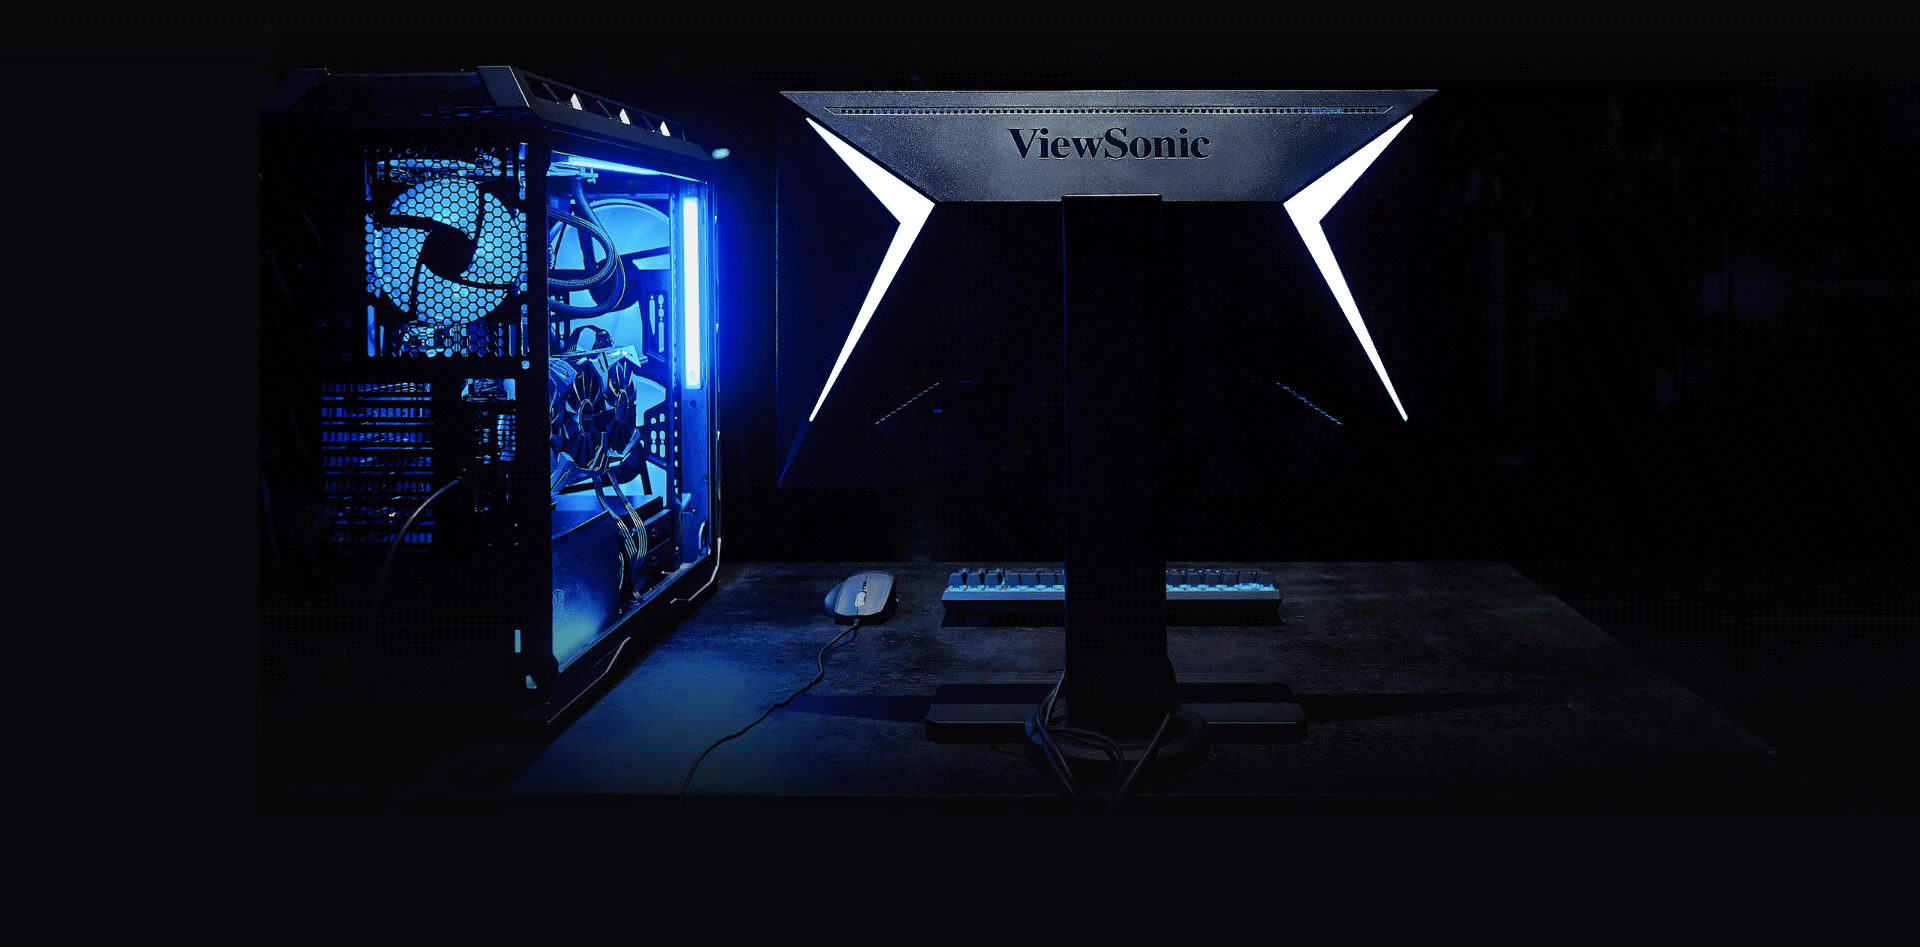

ELITE RGB & MasterPlus+
Eenvoudige installatie
Activating your monitor’s RGB
1.) Plug in the USB 3.0 chord into the monitor and PC.
Type-A (rectangle) plugs into the PC.
Type-B (square) plugs into the monitor.') !!}

2.) Navigeer met de OSD-bedieningsknop op de monitor naar het menu Instellingen en schakel “ELITE RGB” in. Als u de software nog niet heeft gedownload, klik dan hier.
Basic lighting functie setup
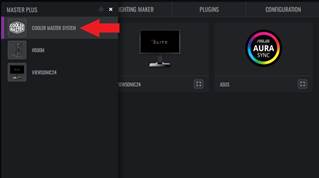
1.) Klik op het Cooler MasterLogo in de linkerbovenhoek van het programma en klik op
COOLER MASTER SYSTEM om alle gesynchroniseerde hardware te bekijken.

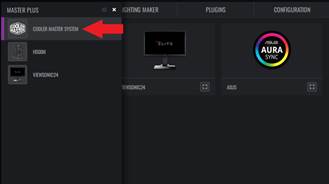
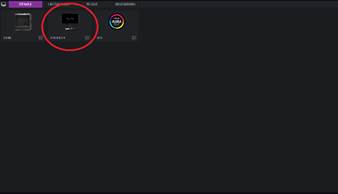
2.) Klik op de afbeelding van jouw ViewSonic Elite gaming monitor.
3.) Aan de linkerkant van het programma onder RGB PORTS, scroll door de lijst met RGB-effecten om de gewenste verlichtingsmodus te kiezen.
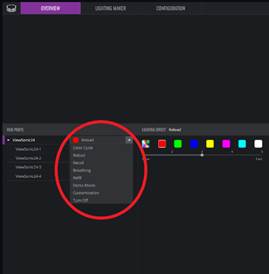
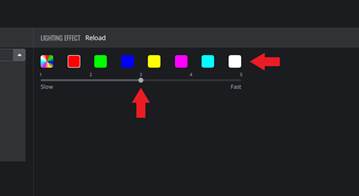
4.) Kies rechts van RGB PORTS in LIGHTING EFFECT
de kleur van het effect door op het kleurenvierkantje te klikken en pas de snelheid van het effect aan door op een getal van 1-5 te klikken. (1 = langzaamst, 5 = snelste)
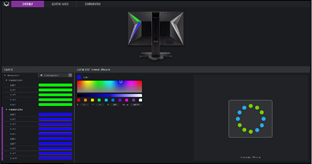
Individuele aanpassing van de LED-kleur (basisverlichtingsmodus vervolg)
1.) Onder RGB PORTS klapt u de lijst met RGB-effecten uit. Onderaan de lijst met RGB-effecten klikt u op Customization
om kleuren voor LED-eenheden te kiezen uit een groter kleurenpalet.

2.) Onder RGB PORTS
you will see the name of your monitor. Underneath the monitor name, click the ViewSonic LED port to add one color to every LED unit in the designated port. (ex.  )
)
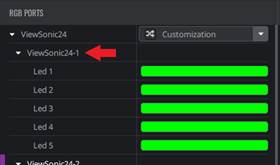
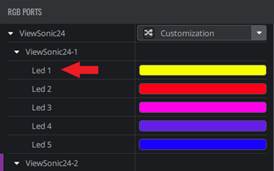
3.) Om de kleur van een individuele LED-eenheid in de LED-poort te veranderen, klikt u op de LED #.
(bijv.
 )
)
Lighting Maker functie
1.) Klik op LIGHTING MAKER bovenin het programma.

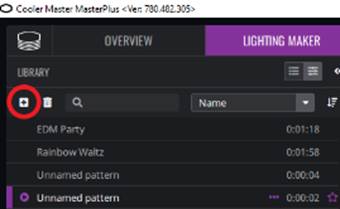
2.) Klik linksboven, onder LIBRARY, op het plusteken om een nieuw patroon te maken.
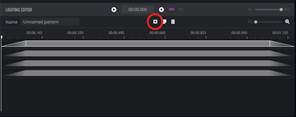
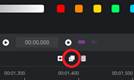
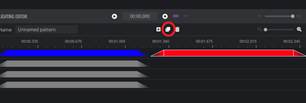
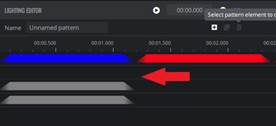
3.) Klik onder LIGHTING EDITOR in het midden van het programma op het plusteken om een nieuw patroonelement aan uw verlichtingsreeks toe te voegen.
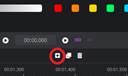
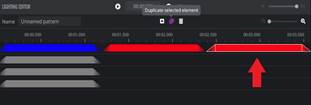
4.) Klik naast het plusteken op de overlappende vakjes om het geselecteerde element in hetzelfde kanaal te dupliceren.
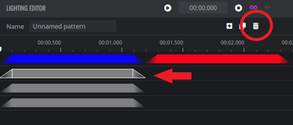
5.) Klik naast de overlappende vakken op de prullenbak om het geselecteerde element te verwijderen.
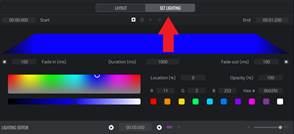
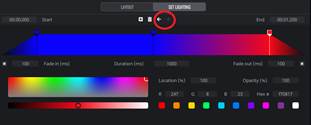
6.) At the top middle of the program, click the SET LIGHTING buttonto display editing features for colors, duration, and the element’s fade in/out.
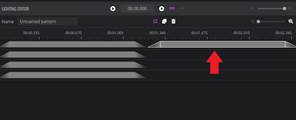
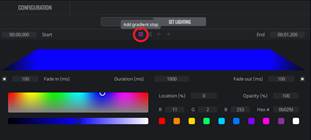
7.) To add gradient stops to your pattern element, click the plus button under SET LIGHTING.
Gradient stops will allow you to add multiple colors in one element. Click the gradient stop and add a new color to the designated area by clicking the desired color in the color palette. The more stops you add, the more colors you can add, but the shorter the colors will become.
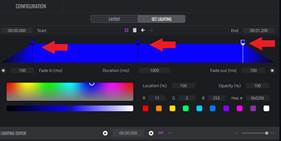
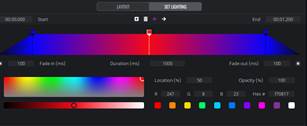
8.) Swap the position of a gradient stop in your pattern element by clicking the stop and then clicking the arrow in the direction you want the gradient to move.
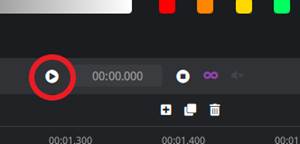
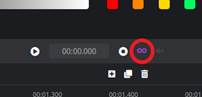
9.) Once you have created a sequence, press the triangle PLAY button in the middle of the program to preview your creation. View the length of your creation in the playback timer next to the PLAY button.

10.) Next to the playback timer, click the infinity sign to loop on/off the playback of your created lighting sequence.
1.) Under LIBRARY in the LIGHTING MAKER section, click the Lighting Application button.
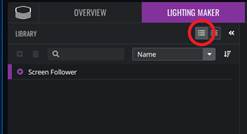
2.) Click the triangle PLAY button next to Screen Follower to activate the Screen Follower mode.
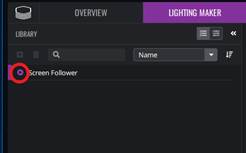
3.) Once you hit the PLAY button, the RGB will react to the dominant colors displayed on the screen. For the best results, put your game or entertainment in Full Screen.
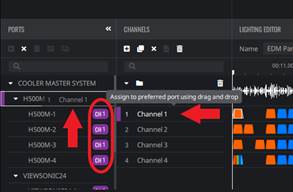
Je monitor synchroniseren met jouw RGB-installatie
1.) Click the Cooler Master logo in the top-left corner, then click COOLER MASTER SYSTEM at the top of the list.
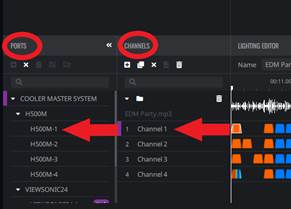
2.) Click LIGHTING MAKER at the top of the program.

3.) In the middle-left side of the program under PORTS,
you will see the devices synced in the COOLER MASTER SYSTEM. Next to PORTS you will see CHANNELS. Click and drag a channel to the preferred port to activate the RGB in that single port. Assign a lighting channel to each port under your devices you want the RGB sequence to be activated.
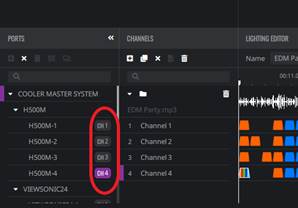
4.) To assign all ports in one device a single channel,
click and drag the channel over-top of the device name. E.g. If you drag channel 1 into device H500M then all ports under H500M will activate the Channel 1 RGB sequence.
5.) Click the triangle PLAY button to activate the RGB assigned to your devices.